
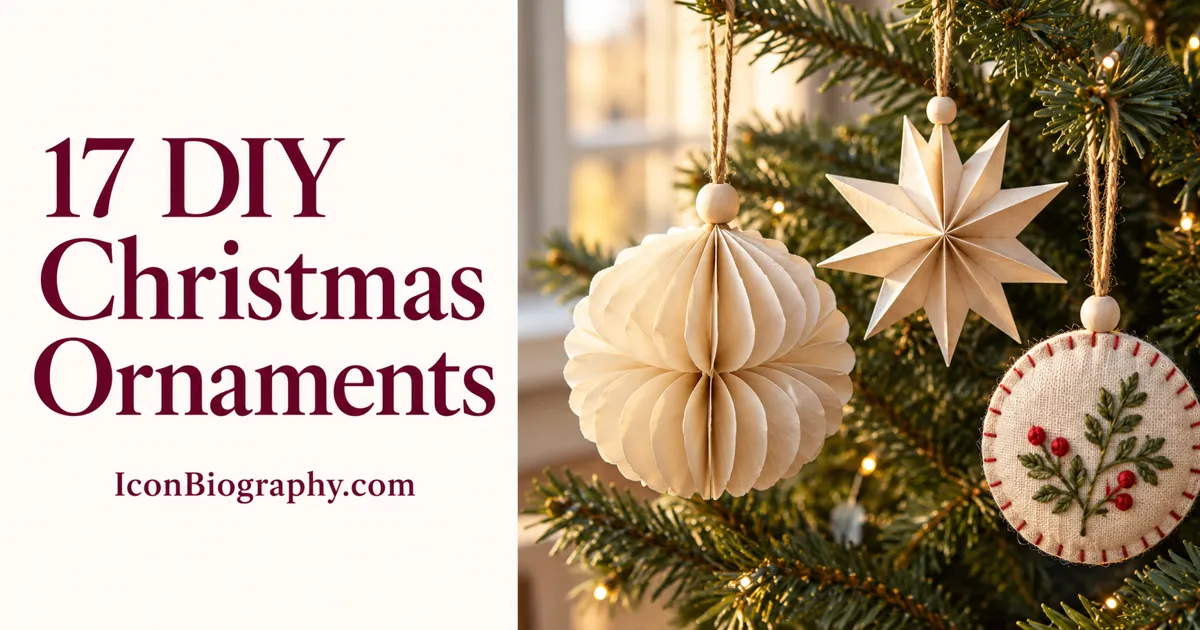
Homemade ornaments can give a Christmas tree a personal feel without a cupboard full of specialist supplies. Paper, ribbon and fabric scraps offer plenty of variety, especially when you repeat a small palette across different shapes.
These DIY Christmas ornaments range from folded paper to no-sew fabric ideas. Each includes a construction approach and a practical detail to watch before hanging. Make one sample so you can adjust size, weight and finish before cutting materials for a whole batch.
Use craft products according to their instructions. Adults should handle sharp tools and supervise children appropriately. Keep small parts, cords and loose materials away from young children and pets. These are decorations, not toys, food or tested child-safe products.
Gather a small set of materials
Start with paper or cardstock, scissors, a ruler, suitable craft glue, hanging ribbon and fabric scraps. Some ideas use felt, wooden discs or a small embroidery hoop. Choose projects that use supplies you already have rather than buying everything on the list.
Match adhesive to the materials and allow its stated drying time. Avoid attaching heavy decoration to a weak paper loop. Keep homemade pieces away from flames and heat and follow instructions for tree lights. Lightweight ornaments are often easier to hang and store than heavily embellished ones.
1. Accordion-Fold Paper Circles

Cut two equal paper rectangles and fold each into an even accordion. Fold each strip in half, secure its inner edges to make a fan, then join the fans into a circle. A small paper circle can cover the central joins.
Attach a lightweight hanging loop to a reinforced fold and allow the glue to dry. Thin paper folds more easily; heavier paper creates a firmer shape. Test the dimensions first so the folds do not become too thick at the center. Repeat one or two colors for a connected set.
2. Layered Cardstock Stars
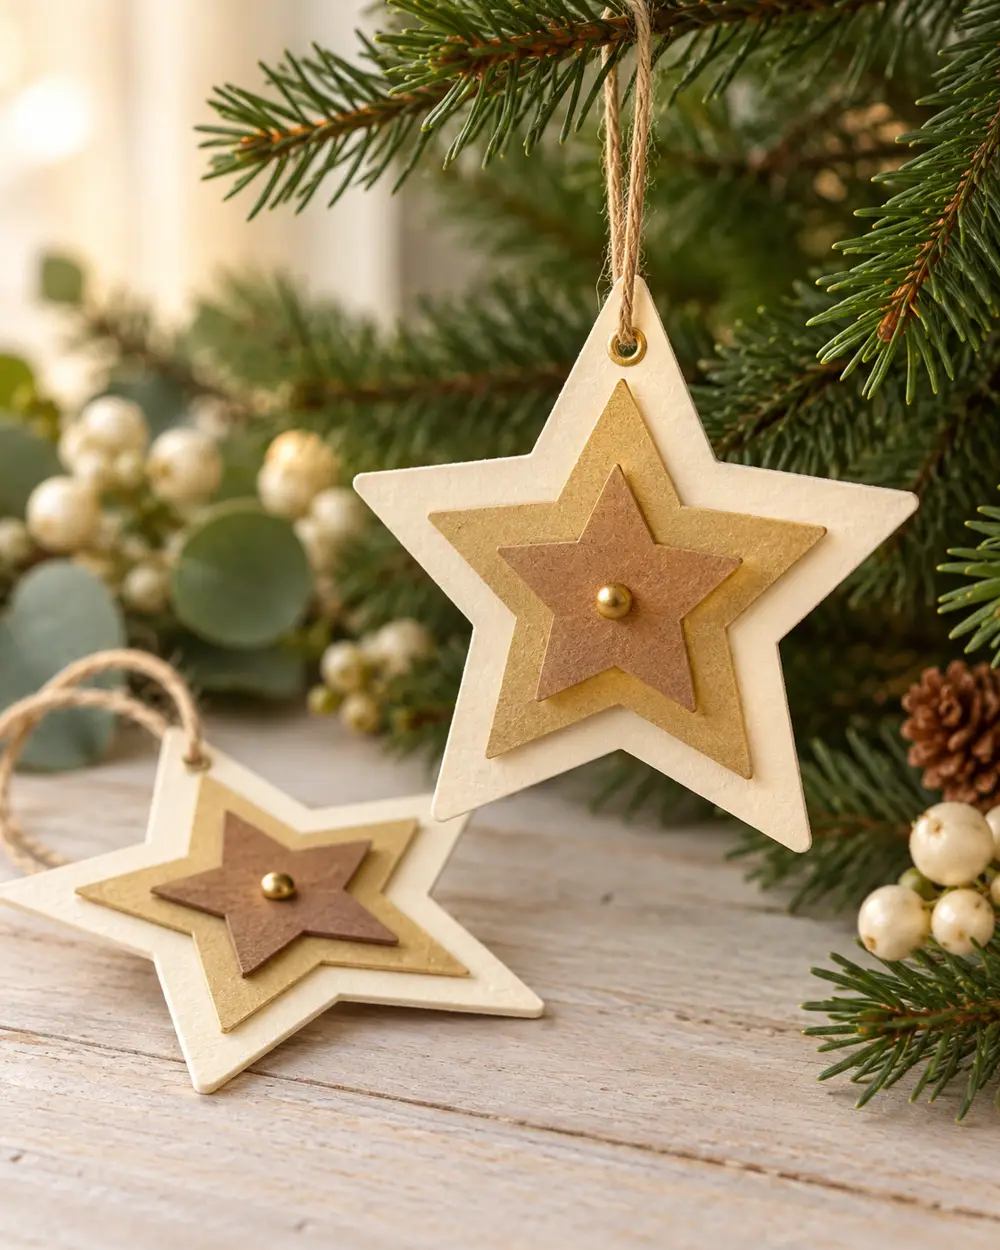
Cut two or three stars in different sizes and stack them from largest to smallest. Use related colors, such as cream, muted gold and brown, or keep every layer the same. Suitable craft spacers can add a little dimension.
Punch the hanging hole through a strong area near the top and reinforce it if needed. Keep the layers light so the ornament hangs comfortably. A broad five-point outline is easier to cut than a delicate design. Use your own template or one you are permitted to reproduce.
3. Ribbon-Loop Tree Ornaments
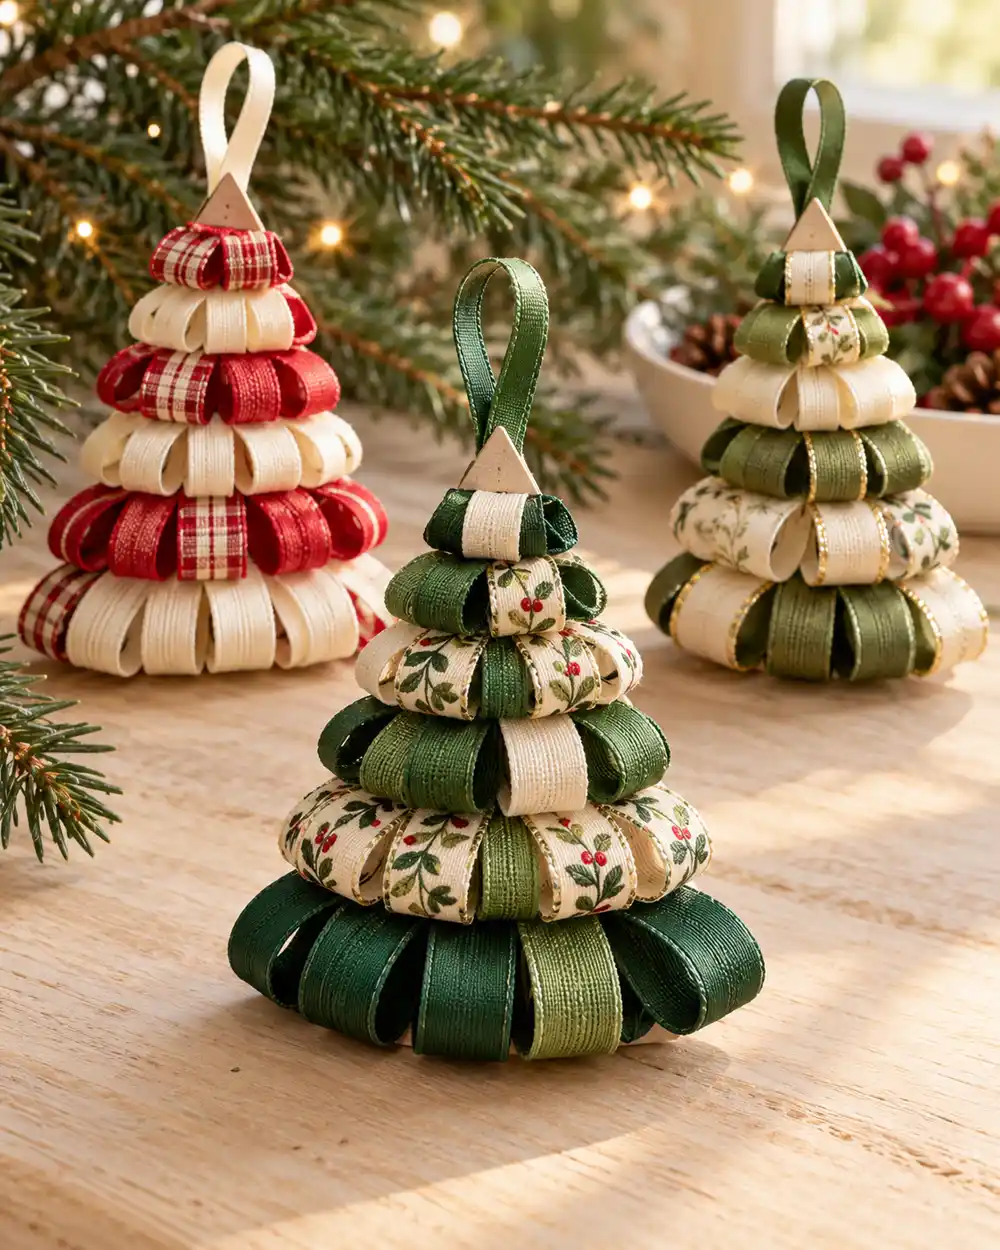
Cut ribbon lengths, fold them into loops and attach them in rows to a cardstock tree shape. Start with wider loops at the bottom and shorten them toward the top. Secure a hanging loop behind the upper point.
Let the backing provide structure rather than relying on ribbon alone. Choose adhesive suitable for both materials and let it set before lifting. A limited choice of ribbon widths makes the rows easier to arrange. Test one loop first if the ribbon has a coating that may affect how the glue holds.
4. Fabric-Covered Cardboard Baubles
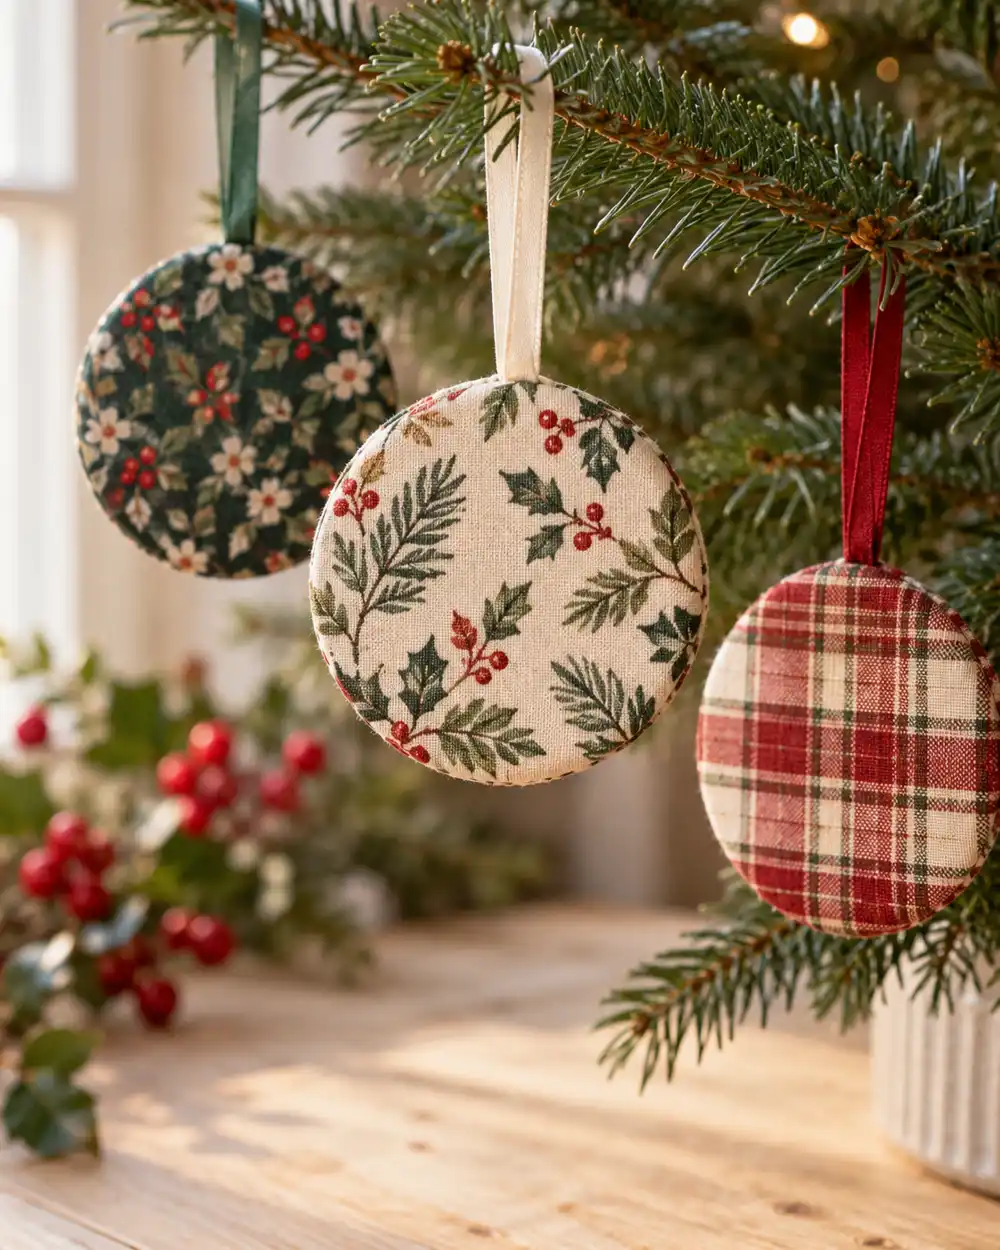
Cut a sturdy cardboard circle for a flat bauble. Cover the front with fabric and wrap the edge neatly behind. Add another card circle at the back to hide the folded edges and strengthen the ornament.
Thin fabric is easier to wrap without a bulky rim. Secure the ribbon loop between backing layers before closing them. This can reuse a meaningful scrap, but choose material you are comfortable cutting. Let the piece dry flat and store it somewhere dry so the cardboard does not warp.
5. No-Sew Felt Trees

Cut two matching felt trees and join the edges with suitable fabric adhesive. Leave the ornament flat or add a very small amount of appropriate filling before closing the final edge. Place a hanging loop between the top layers.
Keep the shape simple and test adhesive on a scrap. If children help, avoid tiny loose embellishments that may detach. A contrast felt trunk or one larger star can provide enough detail. Dry the tree flat so its edges remain aligned, then check the hanging loop before putting it on a branch.
6. Paper-Strip Sphere Ornaments
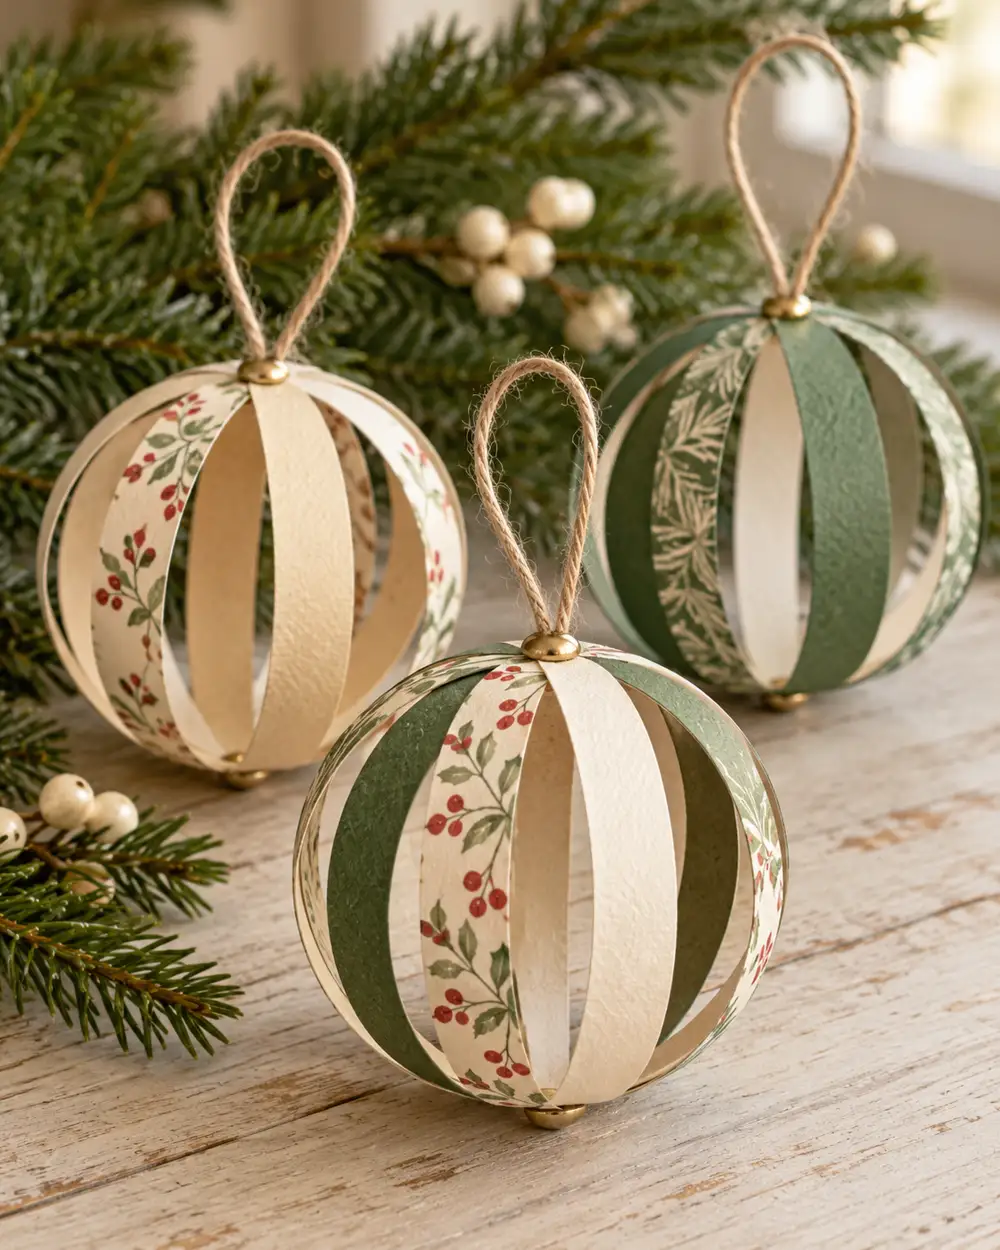
Cut equal paper strips and secure their ends at top and bottom points with a suitable craft fastening. Spread the strips gently around the center to make an open sphere. Add a hanging loop at the top.
Use paper flexible enough to curve without tearing. Test the fastening and strip length on one sphere first. Adults should handle any sharp fastener ends and keep them enclosed. If the form feels unstable, reduce the size or number of strips instead of adding heavier decoration to hold it together.
7. Twine-Wrapped Cardboard Stars
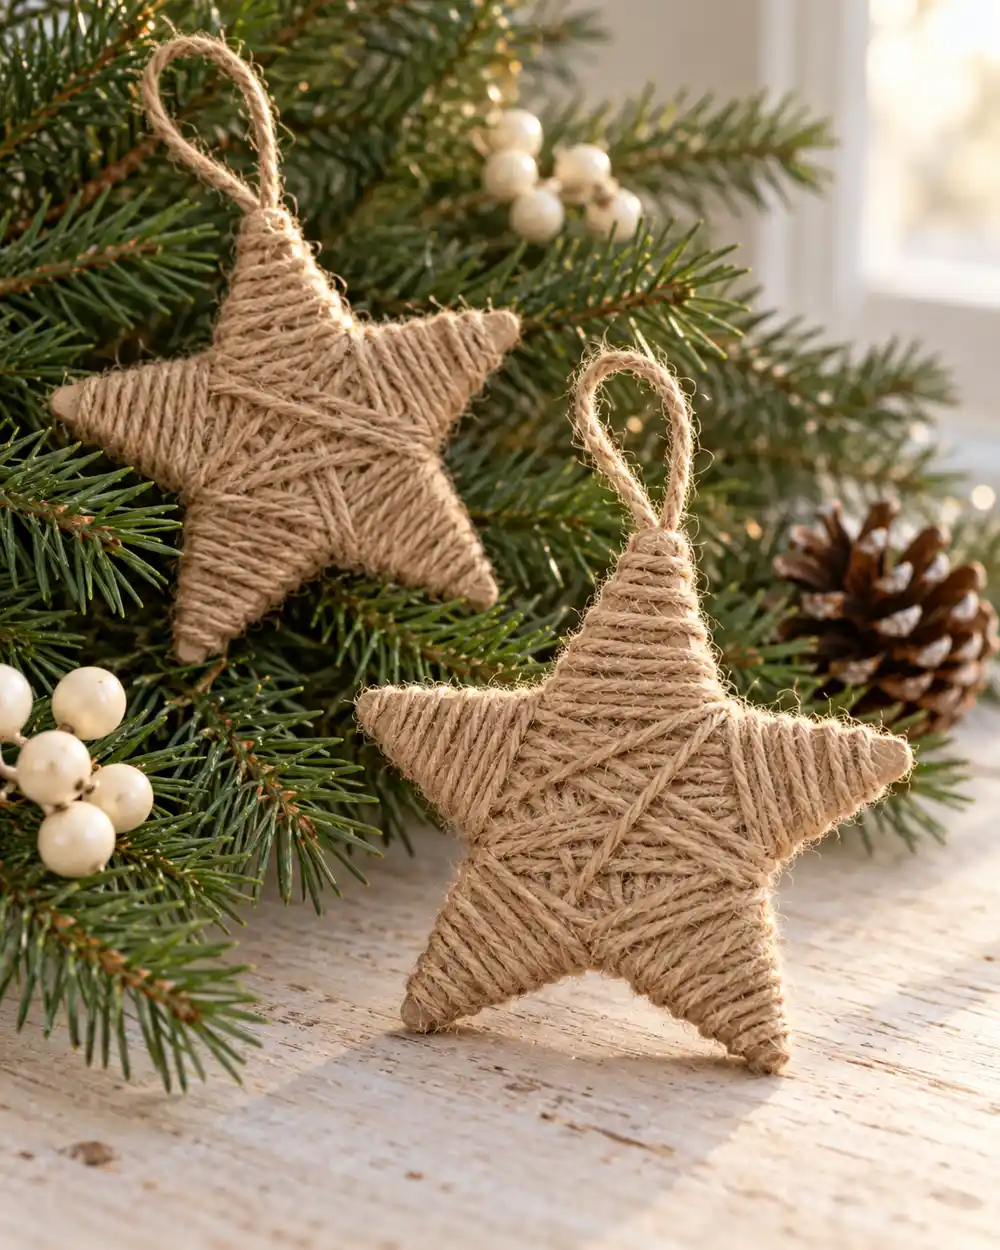
Cut a broad-pointed star from sturdy cardboard. Wrap it with twine, securing the beginning and end with suitable glue. Change wrapping direction around the points until the card is mostly covered, then attach a separate hanging loop.
Do not pull so hard that the cardboard bends. A simple star is easier to cover than a narrow, intricate shape. Keep the finished piece away from heat and out of pets’ reach. Loose string is not a safe play material for animals, even when it forms part of a rustic-looking decoration.
8. Fabric-Scrap Tassels

Cut narrow fabric strips of similar length, gather them around a folded hanging loop and tie a separate strip near the top. Trim the lower ends to create a tassel. Use one color family for a coordinated group.
Choose fabric that gives the amount of fraying you like. If you prefer clean edges, test a less-fraying material or use a suitable finishing method. Keep tassels relatively short and hang them where children and pets cannot pull them. A few fabric textures can add interest without needing additional beads or small fittings.
9. Folded Paper Fan Angels

Make a longer accordion-fold section for the body and a shorter one for the wings. Join them into a simple angel-inspired shape and add a lightweight card circle for the head. Attach the hanging loop at a reinforced upper section.
Keep the pieces proportionate so the ornament does not become top-heavy. Plain cream paper can show the folds without glitter or extra trim. Allow the joins to dry flat before lifting. Store the finished angel where the folds cannot be crushed by heavier ornaments.
10. Painted Wooden-Disc Ornaments
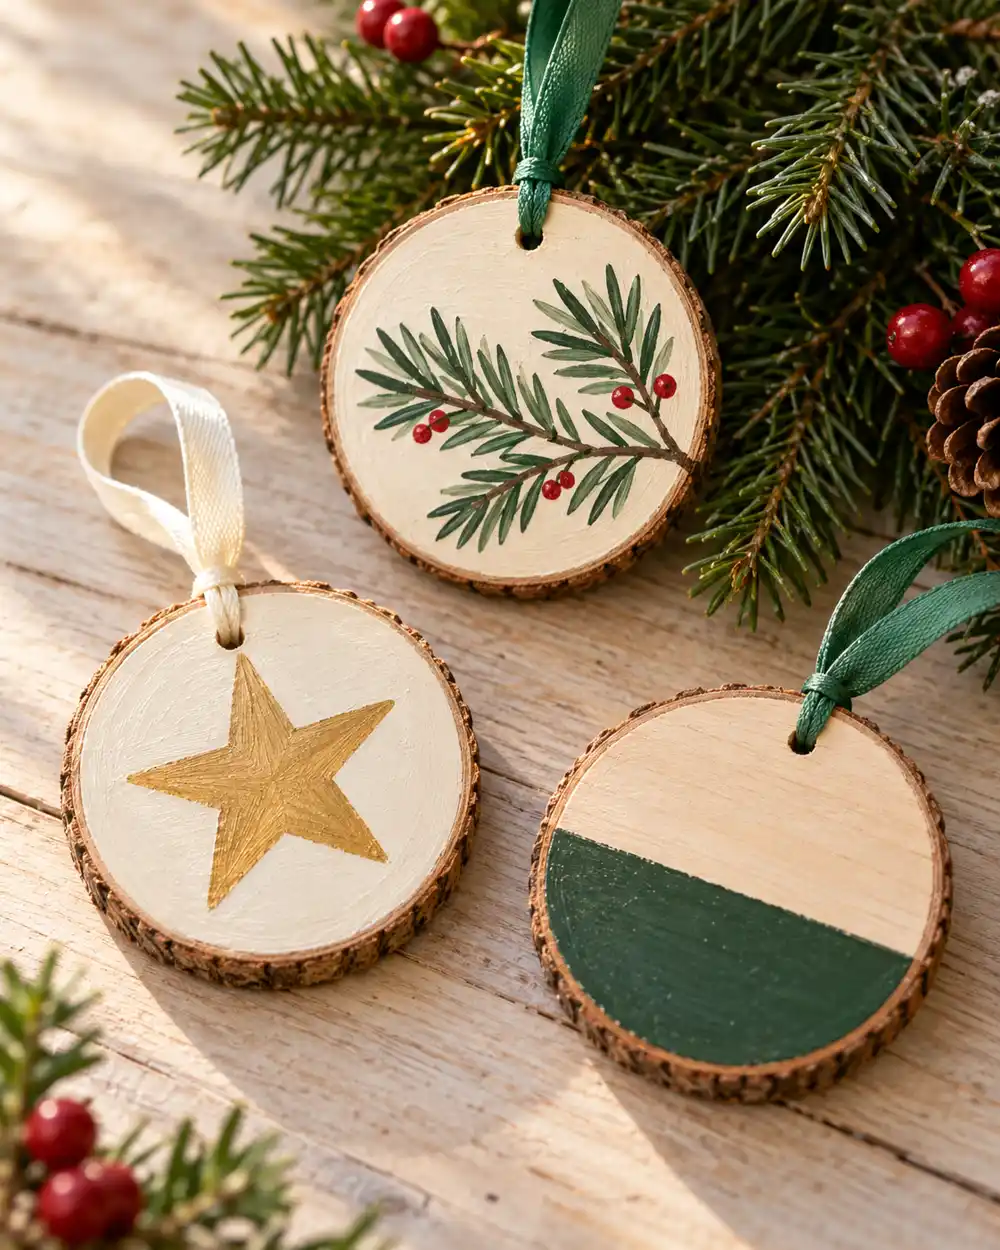
Use craft wooden discs with suitable predrilled holes. Paint a simple star, branch or color block and allow it to dry according to the paint instructions. Add ribbon through the hole after the surface has dried.
Choose products suitable for wood and the intended use. Do not label the finished piece food-safe or child-safe without establishing that for the complete item. If a disc needs drilling, an adult should handle the tool work. Predrilled blanks are the simpler starting point for a small home craft session.
11. Simple Salt-Dough Shapes With Supervised Handling

If you use a trusted salt-dough craft recipe, roll the prepared dough evenly, cut simple shapes and make hanging holes before drying according to that recipe. Keep shapes modest in size so they are not too heavy for branches.
Salt dough is not edible. The FDA warns that salt-dough ornaments can harm pets if eaten. Keep ingredients, drying pieces and finished ornaments out of their reach. Choose paper or felt if you cannot manage that reliably. Decoration should not create a preventable hazard in the home.
12. Small Fabric Bows on Hanging Loops

Tie small bows from fabric ribbon or neatly folded strips. Secure a separate hanging loop at the center so the decorative knot is not the only support. Repeat the same ribbon across the tree for a connected effect.
Try one bow at its intended distance before cutting the whole batch. Narrow ribbon may disappear visually while a very large bow can overwhelm a small branch. Keep tails short enough to avoid tangling with nearby lights or ornaments. Store bows loosely rather than pressing them under heavier pieces.
13. Layered Paper House Ornaments
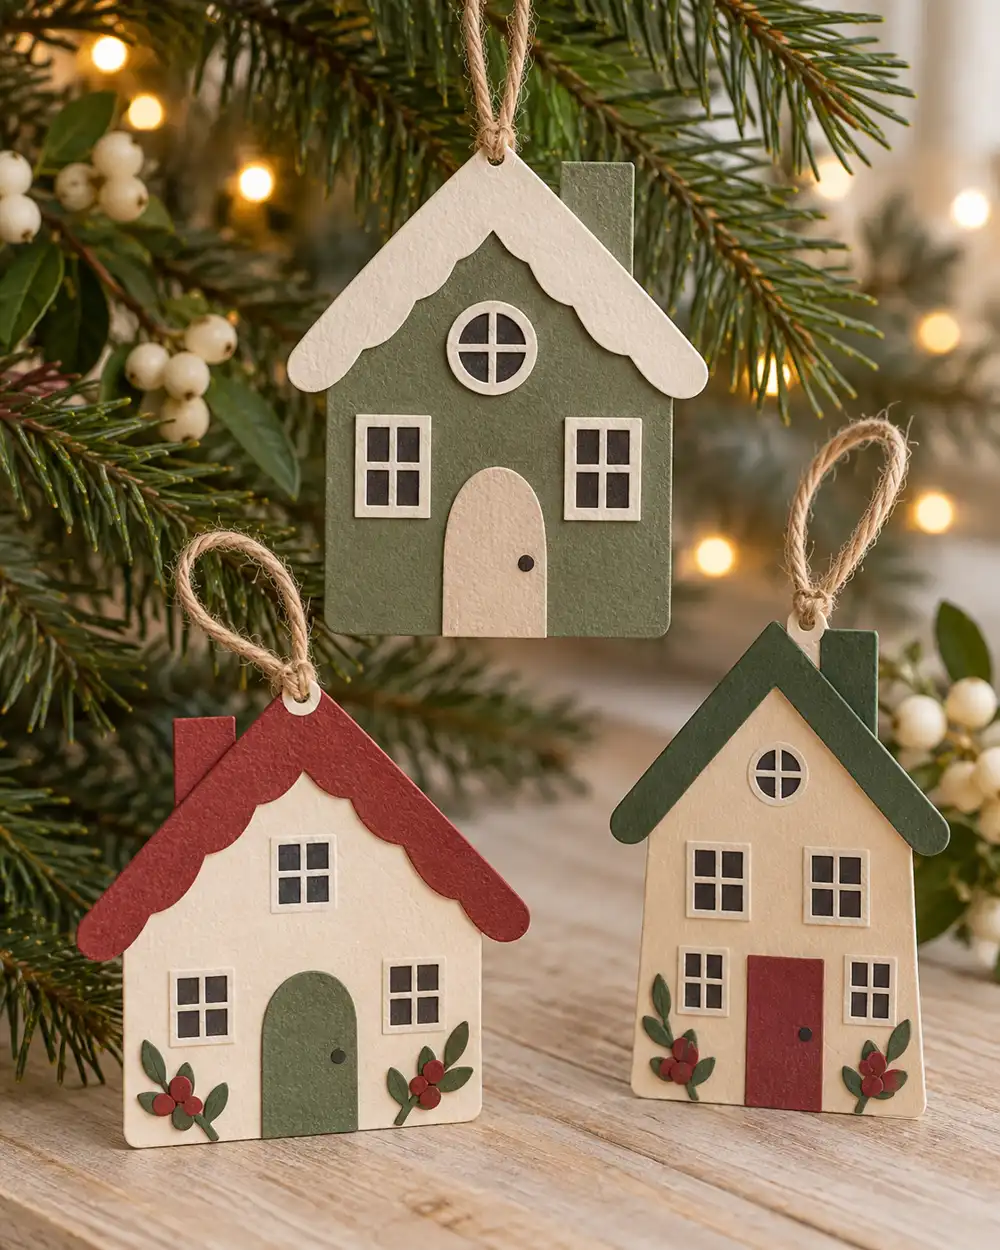
Cut a house silhouette from cardstock, then add a contrasting roof, door and windows. A second backing layer can strengthen thin paper. Place a hanging loop behind a reinforced part of the roof.
Use larger shapes instead of many tiny cutouts when children are helping. A group of houses can share a palette while using different rooflines. Keep the finished pieces flat and lightweight, and make sure the loop holds before hanging. Simple windows drawn with a suitable pen can replace difficult miniature paper details.
14. Felt Mitten Pairs

Cut two mitten shapes from felt and add a contrasting cuff. Attach them at opposite ends of a short cord, then add a central loop for hanging. The pair can be flat rather than stuffed.
Keep the connecting cord short and the joins secure for the way the ornament will hang. A firmer backing can help very thin felt retain its shape. If you add stitching, choose a technique appropriate to the maker’s skill and put needles away safely afterward. Two colors are enough to make the little pair readable.
15. Mini Embroidery-Hoop Fabric Ornaments
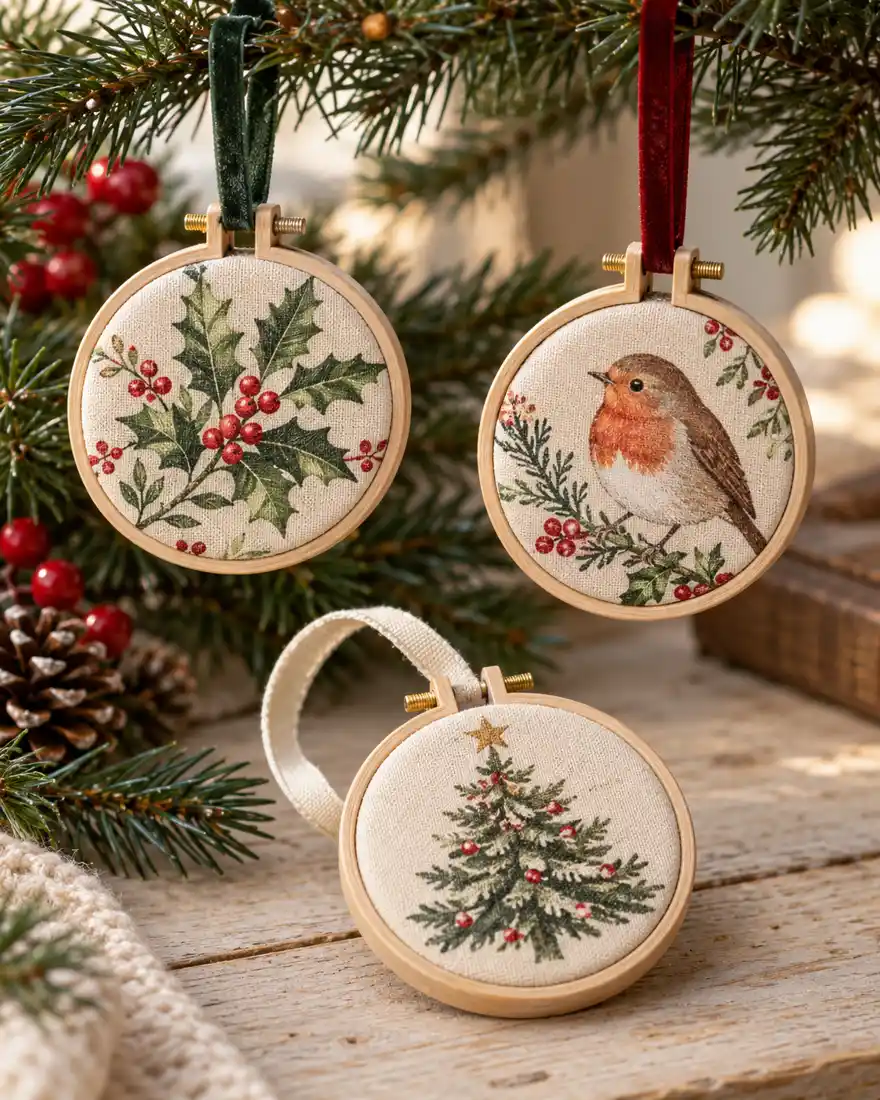
Place a small fabric piece in a miniature embroidery hoop, tighten it according to the design and finish the reverse neatly. Add hanging ribbon at the top. A printed fabric motif can provide the decoration without any embroidery.
Check that the hoop holds securely and has no rough edges. A plain backing circle can conceal the reverse. Choose a lightweight hoop for the branch and keep small hardware away from children. This is a useful way to showcase a small fabric design without cutting it into several detailed shapes.
16. Paper Honeycomb-Inspired Drops
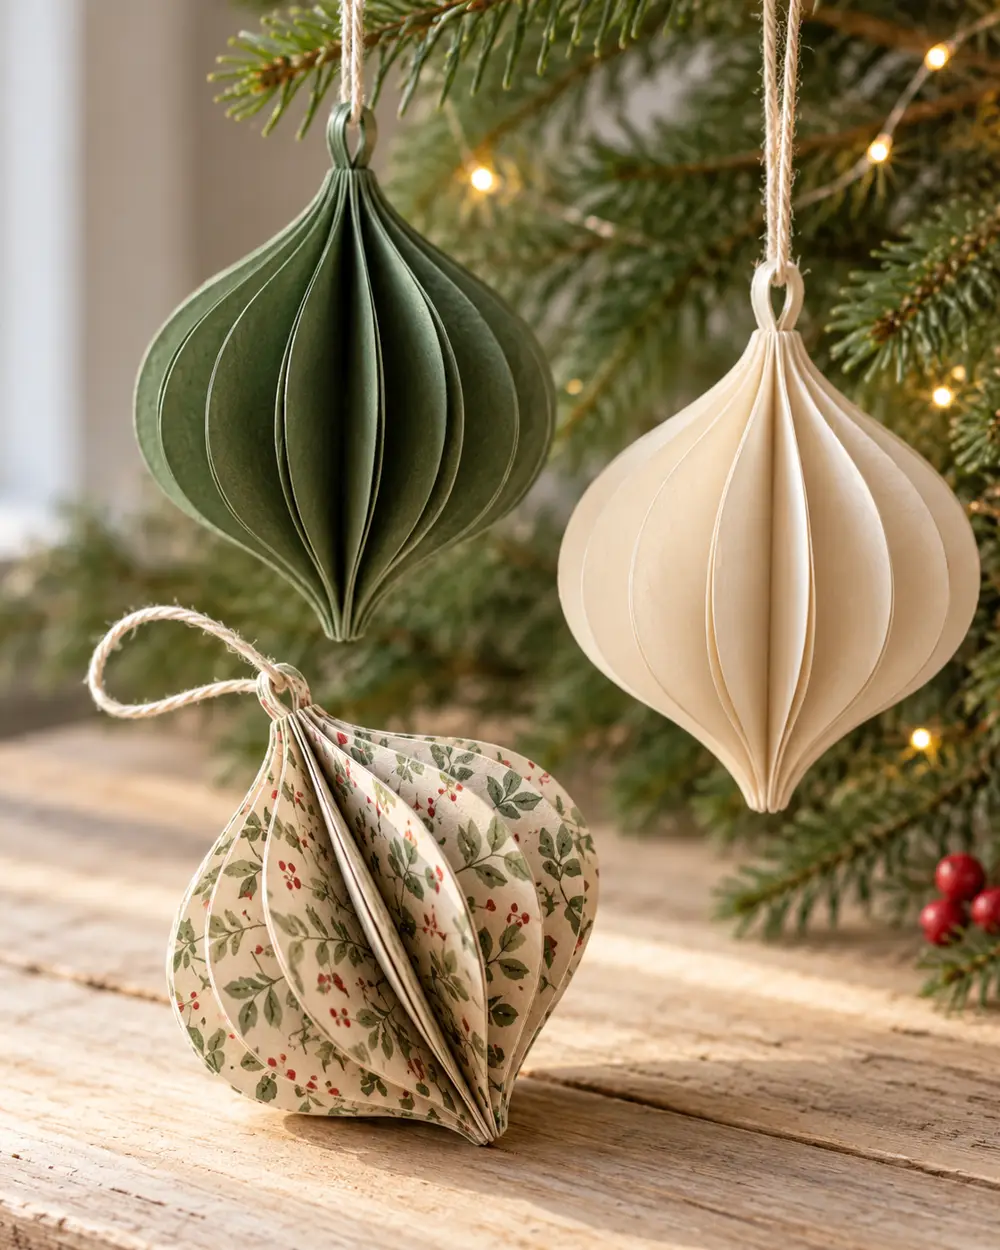
Cut identical teardrop shapes, fold them down the center and glue half of one to half of the next. Continue until they open into a rounded dimensional drop, then join the last edges around a hanging loop.
Keep the glue lines neat and let sections dry before opening. The number of shapes changes the fullness, so test a small version first. This is a simple dimensional paper project rather than an exact copy of a commercial honeycomb construction. Protect the edges when storing it after the season.
17. Cardstock Photo-Frame Keepsakes

Cut a cardstock frame and backing, placing a small photo between them. Add a secure hanging loop and leave the image clear of decoration. Use a duplicate print instead of cutting an irreplaceable original.
Choose an image you have permission to use and consider privacy if sharing the finished project online. A date or message on the back can make it personal without crowding the front. Keep the ornament dry and flat in storage. A lightweight frame is easier to hang than several thick decorative layers.
Make the ornaments look connected
Choose two or three materials and repeat them. Cream paper, burgundy ribbon and brown card can connect stars, bows and houses even though the shapes differ. Make a small group first and look at them on the tree before committing to a large batch.
Consider weight and durability. Paper pieces suit lighter branches, while wooden discs and hoops may need stronger positions. Follow tree and light instructions, leave heat sources clear and avoid loose decorations where they can be pulled down. Homemade pieces still need sensible placement.
Store the finished projects carefully
Let paint and adhesive dry fully before packing anything. Separate delicate folds from heavier discs and keep fabric bows from being crushed. A divided box or shallow layers may help, depending on the ornaments’ shapes.
Keep the collection dry and label it so fragile pieces are not handled roughly next year. Salt-dough ornaments need secure storage away from pets as well as careful display. If an ornament has become damaged, inspect its loop and structure before reusing it rather than hanging it automatically.
Frequently asked questions
Which DIY Christmas ornaments are easiest for beginners?
Layered cardstock stars, fabric bows and flat felt trees are useful starting points. Make one sample, use simple shapes and let adhesive dry fully before hanging.
Can I make ornaments without sewing?
Yes. Paper folds, layered card and suitable fabric adhesives provide several no-sew options. Match the adhesive to the materials and follow its directions.
How do I make different ornaments look coordinated?
Repeat a small palette or material, such as burgundy ribbon or cream cardstock. You do not need every ornament to have the same shape.
Find more manageable projects in our DIY and crafts collection.